Camera Mapping Tutorial in Cinema 4D
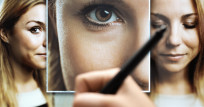
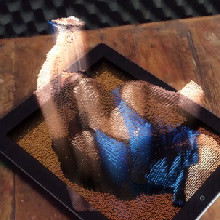
I received several photos for the initial design of the Capture Optimism campaign, one of which stood out immediately; a picture of a cute girl smiling. Since I wanted to do a camera mapping project again for some time, I couldn't help but start right away. And in your free weekend, there is quite some time for fun projects ...
Camera mapping is a technique where you project photos onto 3D objects, and with a small camera movement, you get the feeling that it was filmed. Pretty cool for a flat photo - right?
camera Mapping in C4D | What to pay attention to
First, consider which camera movement you want to make. Based on that, you can already estimate fairly well which parts of the photo that you don't see will have to be manipulated. Consider, for example, updating the background that is hidden behind your subject. Use your stamp tool, healing brush, content-aware fill, or whatever you want.
Tip: Don't waste time on items that don't show up in your final render. For example, I had brushed her feet and shadow away from the beach, but, if you don't see it in the end: don't do it. You can also build your layers in Photoshop first very rough, then model your 3D geometry for the projection, and then do the fine-tuning in Photoshop afterward.
Camera Mapping in C4D | in 5 steps
Making a camera mapping is already possible with one single photo cutout and a matching 3D shape. But to make it more interesting, small extra movements help improve the total experience, for example, by applying deformations due to wind or dynamics. Since this tutorial is not about Photoshop, I’ll skip this part and give a few tips at every step.

Step 1: Prepare the 3D scene
Build a simple background on which you can project your basic photo. Nothing complicated yet, just a limbo, or in this case 2 "planes". Then you first need a camera through which you can project. You do this by giving your background material, changing your material to “camera mapping” and linking your first camera to it. If you have a photo with clear perspective lines, be sure to use the camera calibrator. This tag helps you to trace the original camera position of the photographer. But in this case, it was just a matter of trying and starting.
Determine where you think your main subject is in the scene. Check this by using the same camera mapping technique to project the photo layer of your subject onto something as simple as a "plane". Do this with a few items and regularly switch between your projection camera and your scene camera to get a good impression of whether the basic elements are in proportion to each other.4
Step 2: Modeling 3D shapes & projecting the images
There are many ways to model, but the bottom line is: don't make it too detailed. This scene has been built from the ground up by simply extruding the lines of a polygon until the basic shapes were ready. Make it easy for yourself by using the magnet tool to get your shapes in place, slightly larger than your layer - with transparency - from Photoshop. Or model a little more refined by using your sculpting tools. And it may seem unnecessary, but only model the front :).
Project all layers from Photoshop onto the various geometry through the same projection camera. Only if you are happy with the intermediate result, convert your materials by clicking on “Generate UV coordinates” with your right mouse button. It ensures that your materials move along with your geometry in later animations. Also lock your UVW tag right away, so that you cannot accidentally change your mapping.
Step 3: Build a small animation rig
Make a small hierarchy of joints/bones, just enough to link your 3D geometry. Here too, it applies: keep it simple. Because you can only animate so much until the illusion is broken. A little animation by hand is more than sufficient in this case. Make use of, for example, IK chains where it is useful. In this case, the fish were rigged with IK to later benefit from the wind force. It gives you "free" animation for which you have nothing or hardly anything to do.
Step 4: Add extra movement
All the small details together provide extra credibility. You can, of course, go as far as you want in this, but I’ll point out a couple of items. Vertex maps can be used in various ways. Among other things, to give specific movements a restriction or not. Paint some selections with your paint tool in a vertex map. And again: keep it simple, rough selections with a little bit of smoothing quickly do the trick. Then use these tags in the restriction tabs of your deformers. Another technique is, for example, animating using point animation. Use a pose morph tag with 1 or more sliders for this. In this case, I used four sliders for eyes, jaw, and eyebrows. Certainly use these types of techniques, because it does not take much time, but you ultimately get a lot in return. Read: you get little in return, but those are just the small bits that make the entire illusion plausible.
Stap 5: Setup a render cam
Because your camera movement cannot be very large, it is useful to add two still cameras - for start & endpoint. Then use this in a 3rd primary camera with a morph tag & blend between your start & end camera position. This makes it easy to view your final camera position without necessarily navigating your timeline. Last but not least: with these simple movements, make sure that your key interpolation is set to linear. The default of ease-in / ease-out works less well in most cases. Happy rendering!

Do you want to know more? Then, in the short movie hit the pause button a lot of times :). That may give you a better idea about the setup. If you want a more detailed explanation per step, you can always contact me via CallTheONE.
-
Ales Zahradkaarchitect and tutor€ 0,35 pm
-
Jochem de KlerkCreative missionaryFree
-
Michai Mathieu MorinArt Production€ 5,32 pm
-
Antony BuonomoDesigning, writing€ 0,49 pm
-
Paola EscandonAnimator€ 0,10 pm
