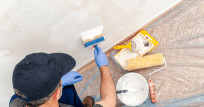
House painting tips and lessons
Online professional painters share their house painting tips and give painting lessons. Anyone can apply paint with a brush, but learning to paint is a craft in itself. Did you know that if you treat wood in the right way, sometimes you don't have to do anything about your woodwork for 5 to 10 years? Though if you don't paint your wooden frames correctly, they can rot within a year.
Painters at TheONE can advise you on how to pre-treat wood, steel or plastic and how to paint it in the right way with the right paint. Therefore, before you start painting, contact a professional painter. This often saves a lot of work and prevents an unwanted result.
There is more to painting than many people would think. Each type of surface needs a different pre-treatment and requires a certain type of paint. Incorrect preparation or paint can influence the end result and lead to wood rot or peeling of the paint. This is a waste of your time and of the purpose of the painting itself. Painting is more than just applying color, it is also the maintenance of the surface.
Preparation before you start painting
Each type of substrate requires a thorough pre-treatment, but the most important thing is that the substrate is free of grease. Whatever type of paint you use, no paint can withstand grease. There are various types of professional grease cleaners, but many painters prefer to use ammonia. Always clean any kind of surface thoroughly with water and then start degreasing.
12 Step-by-step plan for painting wood
- Thoroughly clean with water and a grease remover
- Remove any rotting wood, loose paint or sealant residues.
- Sand the surface roughly, avoiding deep scratches caused by too rough sandpaper.
- Fill holes or uneven areas with wood filler or filler and sand them smooth again.
- Repeat filling and sanding until everything feels smooth.
- Make the surface dust-free with a brush and dry cloth and paste parts that should not be painted.
- Apply a water-based or oil-based primer.
- Roughen the primer with fine sandpaper and correct any unevenness with filler.
- Apply a second coat of primer and sand lightly with fine sandpaper.
- Kit possible seams with an acrylic kit
- Apply the first coat of varnish
- Apply the second coat of varnish
Metal and plastic need a whole different preparation. Some paint melts plastic and others do not adhere to plastic or metal. So get advice from a professional painter via TheONE if you want to start painting plastic or metal.
7 Step-by-step plan for painting walls and ceilings
Most walls are painted with a roller and latex paint. The basic step-by-step plan for painting walls with latex looks like this:
- Clean the walls and ceilings with water and a degreaser
- Remove any loose paint, sealant or wallpaper residue.
- Use a wall filler to fill holes or unevenness on the wall until the wall is smooth again.
- Tape off the floor and window frames
- Paint all seams, cracks, and corners with a large brush and enough paint.
- Roller the walls and ceilings
- Repeat steps 5 and 6 for an even result.
What do you have to be aware of when buying paint?
The color of paint is determined by the pigment that is added. The pigment is expensive and exists in different qualities. Good paint has good quality pigment and has the following advantages:
- The paint covers better, so you need fewer layers.
- The color remains original longer and weathered less quickly due to, for example, weather influences such as sunlight.
- The protection against weather influences such as rain, snow, and moisture is better.
- The paint flows better so that less or no streaks will be visible.
Painters on TheONE know what good and less good paint are. Let them advise you to make your work easier and to improve the result. Some people are seduced by the price of paint. Very cheap paint usually means that the quality of the paint is less, but very expensive paint does not always mean that it is better.
The 5 most common mistakes in painting
Some people are very reluctant to paint, especially with regard to preparation. Usually, this is because they don't know exactly what they are doing and how to do something. Here are some tips to make life as an amateur house painter easier:
1. Less hard sanding: Most people sand too hard and too much. Often a surface only needs to be sanded Because of the thickness of the paint, small irregularities disappear by themselves.
2. Too much filler If you start filling up, build up the filler in layers. Anything you apply too much has to be sanded down again. By applying the filler in layers, the filler dries faster and you need to sand away less.
3. Too little paint Try not to be too frugal with paint. You can't just dip your roller once and then try to paint an entire wall or ceiling. Less paint on your roller makes the rolls heavier and the paint covers less.
The same goes for wood paint. The surface gets through and you also get more stripes in your paint if you use too little paint.
4. Brushes that are too big or too small Don't try to paint a frame with a broom or your entire ceiling with a brush. Each surface has its own size brush or roller.
5. Masking up If you are too economical with masking, there is a good chance that you will spill paint in places where you don't want it. This is an awful lot of work to clean up - more than taping itself - and ugly if you leave it in place.
Why seek advice from house painters through TheONE?
You only pay for the minutes you're on the phone. During these minutes you'll get tips and advice that will save you a lot of time and effort and improve the end result. Using the camera of your Smartphone, the painter can inspect the surface and materials and give instructions.
-
Michael ConnerPro investorUS$ 0,92 pm
-
Hilfi ZainuddinHandymanUS$ 0,42 pm


